
Before you start
Computer tools and KeySigner on iPhone
- Pair the KeySigner computer tools with the phone and add the public key to GitHub as a signing key. Use a test repository to check the signature in Git and on GitHub.
Data and access
Prepare a test repository
Pair your desktop with KeySigner and choose a test signing key. In a terminal, run keysigner-agent setup-git to preview which Git settings will change before applying it.
Check. The terminal preview identifies the test signing key and lists the current and proposed Git settings.
Register the signing key
Add the public key to the test GitHub account as a signing key. Apply the desktop setup with keysigner-agent setup-git --apply only after reviewing the settings it will change.
Check. GitHub lists the public key as a signing key. The settings you apply match the preview.
Approve and verify a test commit
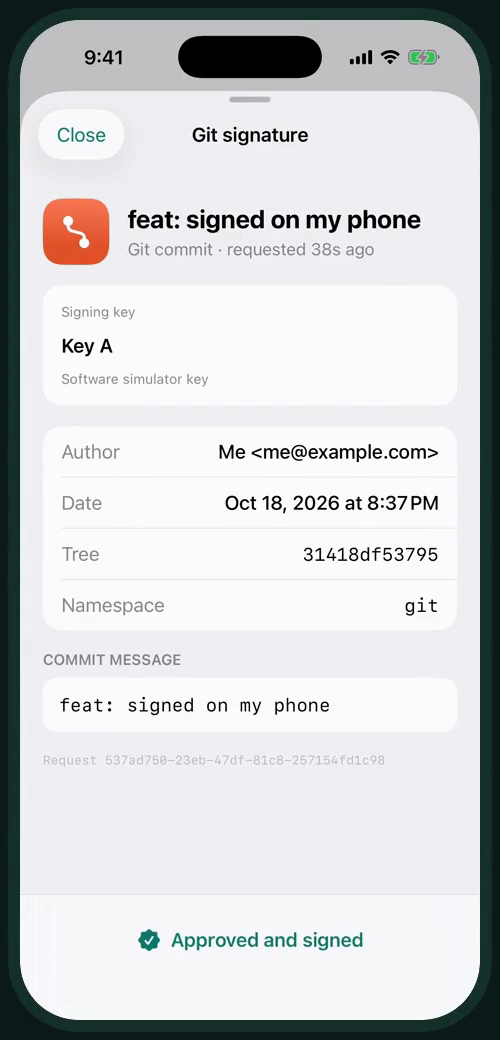
Make a signed test commit. On your phone, check the subject, author and full message before approving. Push the commit to the scratch repository and open GitHub’s verification details.
Check. The test commit on GitHub shows Verified. Open the verification details and match the commit ID to the commit you just pushed.
Check your result
Compare the commit and signing identity in GitHub with the approval on your phone. To restore your local settings, run keysigner-agent rollback git. Remove the test key from GitHub separately.
If you get stuck
GitHub shows the commit as unverified
Compare the public key shown by keysigner-agent keys with the signing key registered in the GitHub account. Check that the commit’s committer email is verified on that account. Run git verify-commit locally to isolate signature generation from GitHub verification.