Before you start
KeySigner on iPhone or Mac with Sign-in codes
- Use a test account with a confirmed email and working Git access. Keep the original browser session open and save Bitbucket’s recovery codes separately.
- Use a test account that signs in directly to Buildkite. Save the recovery codes before proceeding to the setup QR code.
- Use a test account and keep the original browser session open. Save the recovery codes when SourceHut activates the method.
Data and access
Open your account’s setup QR code
Use a test account you control and keep the original browser session open. Confirm the email or username before opening the provider’s two-factor settings.
Find your provider’s settings
 Bitbucket Cloud
- Confirm your email and meet Bitbucket’s Git access requirements first. In Bitbucket, open Personal Bitbucket settings, then Two-step verification under Security. Use the Bitbucket setup screen for this check. Atlassian account security has its own settings.
 Buildkite
- In Personal Settings, open Two-Factor Authentication and start setup. Save the recovery codes before proceeding to the QR code. Use a test account that signs in directly to Buildkite.
 SourceHut
- Open your SourceHut account’s Security page and choose Enable TOTP to display the QR code. Have a separate place ready to save your recovery codes as soon as setup completes.
Check. You can see a QR code in the provider’s settings for the intended test account.
Scan the QR code in KeySigner
In Accounts, choose Add (+), then Sign-in codes and backup. Unlock Sign-in codes, choose Add account, and scan the QR code. Check the issuer and account before saving. Keep the QR code and setup key private.
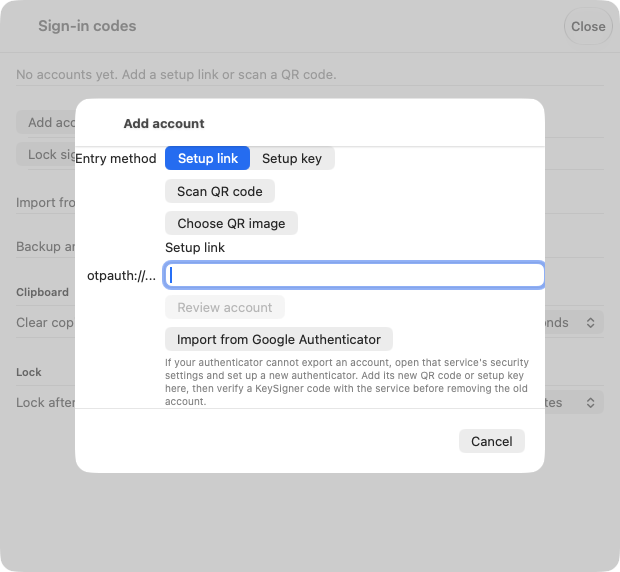
The KeySigner setup screen on Mac. Use your test account’s QR code. View full-size screenshot Check. The saved entry in KeySigner matches the provider and account shown in your original browser.
Confirm the code and save recovery codes
Choose Show code in KeySigner and complete the required approvals. Enter the current code in the provider’s setup form. Save the provider’s recovery codes somewhere you can reach independently of KeySigner. Buildkite displays them before you scan. Bitbucket and SourceHut display them after you confirm the code.
Check. The provider shows two-factor verification as enabled and you can find the recovery codes without opening KeySigner.
Try a fresh browser sign-in
Open a private browser window. Sign in to the same provider as the same test user and enter a new code when prompted. Keep the original session open until the provider accepts the new code.
Check. The provider accepts a new code for the same account. For Bitbucket, also confirm your existing Git access still works with a read-only operation against your test repository.
Check your result
Record the account, the provider that accepted the code, and where you stored recovery codes. This check covers the test user’s browser sign-in. Review repository permissions, runner credentials, and API access separately.
What we tested
Tested on . In a local KeySigner vault test, an independent verifier accepted a current authenticator code and refused an expired code and the wrong account. The Bitbucket and Buildkite steps follow provider documentation. The SourceHut steps follow its published account settings code. Verify each hosted account with a fresh browser sign-in.
If you get stuck
The code is rejected or there’s no code prompt
Check the saved account and the device clock. If the timer is nearly out, wait for the next code. If the browser opens an existing session or sends you to an identity provider, check which account is handling sign-in. For Bitbucket, check whether the prompt is from Bitbucket or your Atlassian account.