Before you start
KeySigner on iPhone or Mac with Sign-in codes
- Use a non-admin test user on a test instance. In Settings → Security, choose Enroll in Two-Factor Authentication. Save the single-use recovery key and have the signers your rule requires available.
- Use a non-admin test user on a test instance. In Settings → Security, choose Enroll into two-factor authentication. Save the single-use recovery key and have the required signers available.
- Use a test account you control. Codeberg documents a six-digit time-based code in Settings → Security. Save the scratch token separately before checking a fresh sign-in.
Data and access
Open the setup QR code
Sign in as a disposable user on the instance you want to test. Open your profile menu, choose Settings, then Security. Find the button below the two-factor authentication heading. Keep the setup QR code private.
Find the enrollment button
 Gitea
- Under Two-Factor Authentication, choose Enroll in Two-Factor Authentication.
 Forgejo
- Under Two-factor authentication, choose Enroll into two-factor authentication.
 Codeberg
- In Security, choose the two-factor enrollment button. Codeberg calls the single-use recovery key a scratch token.
Check. Check that the Security page belongs to your intended host and disposable user before scanning its QR.
Add the test account to KeySigner
Open Accounts, then Add (+) and Sign-in codes and backup. Unlock Sign-in codes and choose Add account. Scan the setup QR code or use Choose QR image on a private local copy. Check the issuer, account name and time-based code type, then choose Confirm and add.
Check. Confirm the account list shows the expected host issuer and username.
Verify enrollment and save the recovery key
Choose Show code in KeySigner and complete the approvals your signing rule requires. Enter the current six-digit code in Passcode and choose Verify. Save the single-use recovery key somewhere you can reach independently of KeySigner.
Check. The Security page shows two-factor authentication is enabled and offers the recovery key controls.
Try a fresh sign-in
Keep your first session open. In a private browser window, sign in again to the same instance as the same user. At the two-factor prompt, get a new code from KeySigner and enter it in Passcode, then choose Verify.
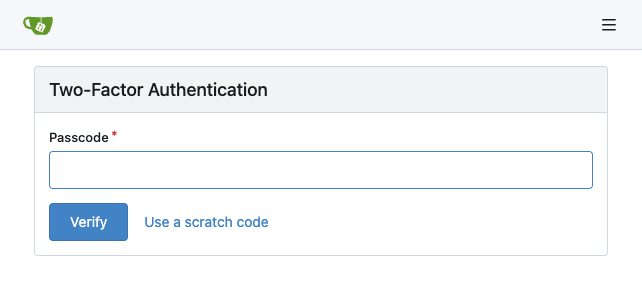
The fresh sign-in prompt in a local Gitea 28.4.0 test instance. The passcode field is empty. View full-size screenshot Check. The private session prompts for a passcode. An incorrect code leaves access blocked. A fresh valid code opens the account.
Check your result
Security settings show that two-factor authentication is enabled. The private session opens your account after you submit a fresh code.
What we tested
Tested on . We used the KeySigner vault and a browser with local Gitea 28.4.0 and Forgejo 17.0.1 instances. Both accepted the enrollment code and a new sign-in code, and rejected an incorrect code. The Codeberg steps follow Codeberg’s hosted service documentation.
If you get stuck
The site rejects a passcode
Check the instance and username against the entry in KeySigner. Confirm that your device uses automatic date and time, then wait for a new code and try once more. If you lose access to the authenticator, choose Use a scratch code and enter the saved recovery key. After using it, save a replacement from Security settings.