Before you start
KeySigner on iPhone or Mac with Sign-in codes
- Use an Identity Engine test user whose enrollment and app policies allow Google Authenticator. Keep a second method or an administrator who can reset enrollment available.
- Use a test user whose OneLogin policy includes Authenticator. Verify from a fresh browser and keep a separate enrolled method or admin reset available.
- Use a miniOrange IAM test user whose profile offers Google Authenticator. Confirm an administrator can restore the prior method or reset enrollment before making a change.
- Use a Fusion test account backed by an Oracle Cloud IAM identity domain that offers third-party authenticator enrollment. Keep a bypass code or independent recovery method available.
Data and access
Open the authenticator setup for a test account
Use an account whose policy already allows time-based codes for the app you want to check. Keep the original session open and confirm that you have an independent way back in, such as a second enrolled method or an administrator who can reset the test account’s enrollment.
Find your provider’s settings
 Okta Identity Engine
- From the End-User Dashboard, open Settings and find Security Methods. Set up Google Authenticator if it is assigned to your account. Check with your administrator that the intended app’s policy accepts this method.
 OneLogin
- In the OneLogin user portal, open Security Factors in your profile and choose Authenticator. The same option can appear during first sign-in. Your administrator must enable it in your user policy.
 miniOrange IAM
- In the IAM Self-Service Portal’s two-factor settings, open Authentication Apps, select Google Authenticator, and choose Edit to open its QR code. Use a test profile that offers this method.
 Oracle Fusion Cloud Applications
- Use a Fusion test account backed by an Oracle Cloud IAM identity domain. Open Manage Secure Verification in password preferences or follow the enrollment prompt. In the mobile app setup, choose Offline Mode or Use Another Authenticator App when offered to get the passcode setup QR code.
Check. Your test account shows a setup QR code for a time-based authenticator.
Save the setup QR code in KeySigner
In Accounts, choose Add (+), then Sign-in codes and backup. Unlock Sign-in codes, choose Add account, and scan the provider’s setup QR code. Check the issuer and account before saving. Keep the QR code and setup key private.
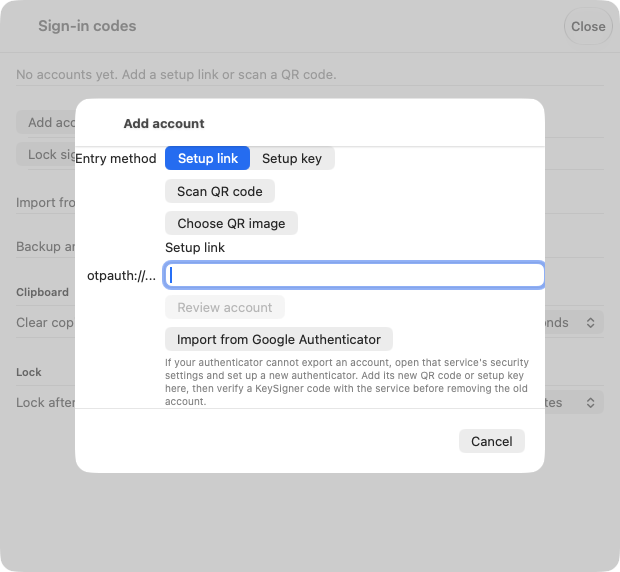
The account setup screen in KeySigner for Mac. View full-size screenshot Check. The account listed in KeySigner matches the provider and test account in your browser.
Complete enrollment with a current code
Choose Show code in KeySigner and complete the required approvals. Enter the current code if the provider’s setup asks for one. Finish the provider’s enrollment and keep your independent recovery method available.
Check. The provider lists the authenticator as enrolled and you can reach an independent recovery method.
Check the app in a fresh browser
Open a private browser window and sign in to the intended app as the same test user. Choose the time-based code method if the provider offers a choice. Enter a new code from KeySigner and confirm the app opens before closing the original session.
Check. The app opens after the provider accepts a fresh code from KeySigner.
Check your result
Record the test account, app, verification method, and the independent recovery route. The provider checks the code and controls access to the app. Keep separate records for app assignments, provisioning, and any policy that requires a passkey or security key.
What we tested
Tested on . In a local KeySigner vault test, an independent verifier accepted a current authenticator code and rejected a stale code. The enrollment steps follow provider documentation. Use a fresh browser to verify that your hosted app accepts a code for the test account.
If you get stuck
The app asks for a different method or rejects a code
Check which provider is handling the sign-in and what the app’s policy accepts. If you see a push or security key prompt, ask your administrator to confirm the intended method for the test account. For a rejected code, check the saved account and device clock before retrying with a fresh code. Pause if a fresh code still fails and check the provider’s recovery instructions.